New Search Functionality
The new functions included in the Vendor search were created to aid you in finding subs as well as increase the performance of the search to minimize time spent waiting on the search results. Major Changes or new functions include the following:
- Display Search Results laid out in CSI format
- Selecting subs for only the type of work you want to invite them to
- Assigning a Sub a new code that they did not have on their profile for the project only or to their profile as well.
- Limit on Search Result Rows
- Range Search on Company Name
- Search by Email Address
- Search for Blank Phone Numbers, Fax Numbers, and Email Addresses
The new search functionality will be available in both the Vendor Directory search in the Administration area and in the Invite to Bid section of each project.
All of the examples and screen shots in this document will be taken from the perspective of the Invite to Bid section of a project.
Display Search
Results laid out in CSI Format
This new feature lays your search results out in CSI format. So for example if AAA Drywall Sub has both 09250-Drywall and 09900-Painting on their profile they would appear twice in the Search results once in the 09250-Drywall section and the 09900-Painting section.
There is, however, a new added feature that changes the way you select bidders in the Invite to Bid area. If choose to have the search results laid out in CSI Format when you select AAA Drywall Sub out of the 09250-Drywall section they will only be added to the 09250-Drywall code on the Bidders List. In the past, when selecting subs from the search results, the company would be added to any code that is on their profile that matched a code setup on the project, so in this example AAA Drywall would have been added to both 09250-Drywall and 09900-Painting because that is what they matched.
It is important to understand this new twist because you could forget to add a sub to all the codes they need to be invited to.
General Changes
Some General Changes to note. The search page is no longer a floating pop up window it is now its own page. This is a minor change and will affect the display of the search results slightly
Display Options
![]()
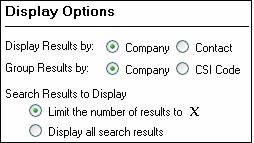
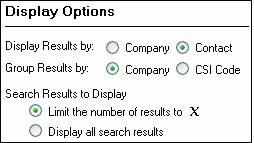
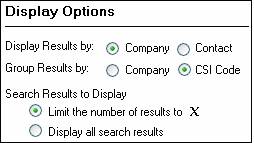
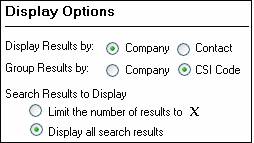
This display options box allows you to select how you would like your search results displayed.
Display Results by:
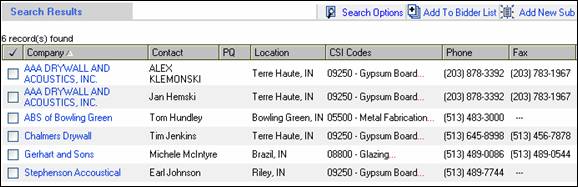
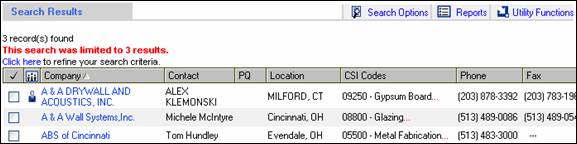
When this is set to Company the Search Results will look like the following screen shot:
All the functions on this screen shot are pretty much the same as they used to be.
Notice there is are multiple contacts for A & A Drywall
company. The multiple contacts is
signified by the ![]() icon.
Clicking on this icon would open up all the other related contacts at
that company so you could select them.
icon.
Clicking on this icon would open up all the other related contacts at
that company so you could select them.
Putting a Check next to a company’s name and clicking the ![]() button would add them to the Bidder List. Also since we have searched and displayed the
results laid out by company name it will add the selected sub to all the codes
that they match on the project.
button would add them to the Bidder List. Also since we have searched and displayed the
results laid out by company name it will add the selected sub to all the codes
that they match on the project.
Clicking on the name of the sub still takes you to that subs profile for editing.
The ![]() button still brings up a blank profile so that
you can add a sub to the Bidder list “on the fly”
button still brings up a blank profile so that
you can add a sub to the Bidder list “on the fly”
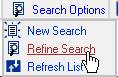
The ![]() button brings up the following drop down menu:
button brings up the following drop down menu:
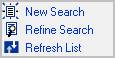
Since the search box is no longer a pop up window that hovers you will need to use this menu to start a fresh new search, just refine the search criteria you just used, and to refresh the page.
![]()
When this is set to Contact the Search Results will look like the following
screen shot:
Notice that there are two separate lines now for A & A Drywall.
![]()
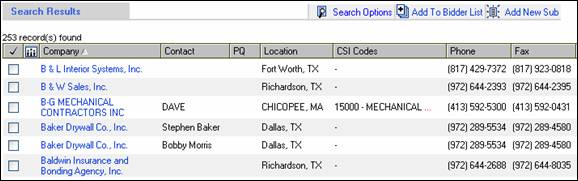
When the selection is set to group the results by CSI code the results are displayed as shown in the following screen shot:
![]()
![]()
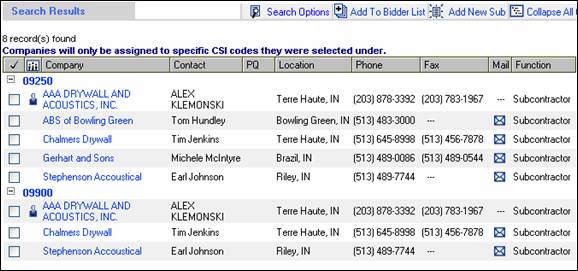
Notice that A & Wall Systems displays in both the 09250 section and the 09900 section.
If you put a check mark next to AAA Drywall in only the 09250 section they will only be added to the Bidder List under the 09250 code, which in turn means that the only code on their invitation will be 09250.
If you want to have them invited to both the 09250 code and
the 09900 code you will need to check both of them in this screen before
hitting the ![]() button.
button.
Assigning CSI Codes
to Subs
One of the new features is the ability to add CSI codes to a subs profile “on the fly” in the project. The example situation shown below will show you how to do this. In this example there is a subcontractor in the Database named Top Flight Escalators who is assigned the code 14300-Escalators but does not have code 14200-Elevators which is the code that they need to be invited on for this job.

![]()
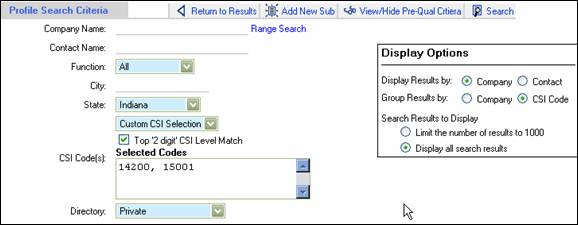
If you list out codes in the Selected Codes box shown above and you click the Top ‘2 digit’ CSI Level Match button it will bring back all the subs in each division and list them under the selected codes so you can add them to the project in those codes.
So for example, using the selections shown above 14200, 15001 if the Top ‘2 digit’ CSI Level Match is checked and the Group Results by CSI Codes is checked the results would look like this:
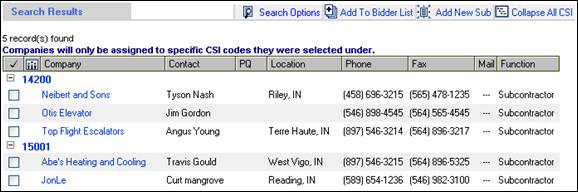
What has happened is since the Top ‘2 digit’ CSI Level Match
was checked the search results displays any company that has a Div 14 code in
their profile currently under the 14200 code.
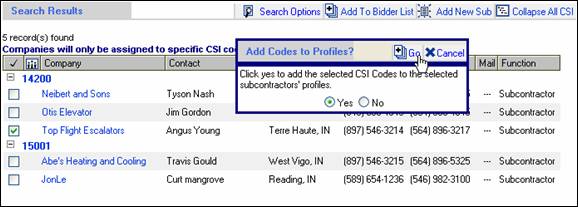
By placing a checkmark next to Top Flight Escalator and clicking the ![]() button, they will be added to the 14200 code
for this project.
button, they will be added to the 14200 code
for this project.
A pop up box will ask you if you want to make this new code permanent to their sub profile. Selecting Yes will make it permanent, selecting No will just add them to 14200 for this one off project.
Also included in this example was the code 15001. Neither Abe’s Heating nor Cooling and JonLe have the code 15001 on their profile but they did have a Div 15 code, so they are eligible to be added to the 15001 code.
When you check the Top ‘2 digit’ CSI Level Match the search
will bring back any company that has any Div 14 or 15 code. Obviously in your
database you probably have more than 3 subs with Div 14 and 2 with Div 15 codes
(but it is just an example eh?)
![]()
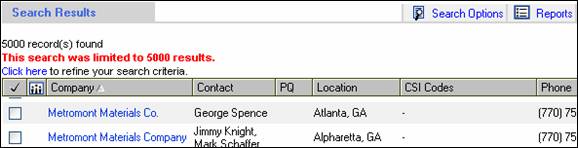
The limit will be set to X records in the results when this selection is made. X defaults to 1000 and can be changed on your profile page. The largest number X can be set to is 5000. ( To change this setting click on the Admin button at the top and then find the My Profile link in the folders on the left hand side.)
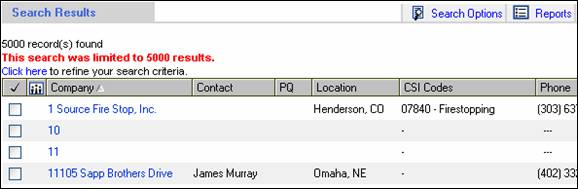
![]()

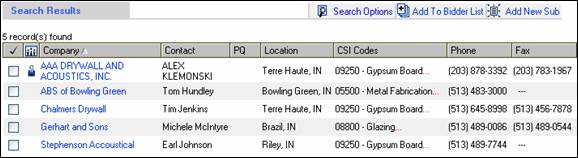
Notice at the top of the search results it shows you how many records were returned. As long as X is set to be a number greater than the rows returned you will see all the rows.
In this example (not that you would ever do this but) if X = 3 you would see the following screen:
If you do reach the maximum of X in a search you can go back to the Display options and alter the search to Display all search results. This does however have a ceiling of 5000 records.
If the search you are doing is more than 5000 it is recommended that you filter by some other field in your search to bring the results down below 5000. You can also use a Range Search to aid you in getting the search results below 5000 records.
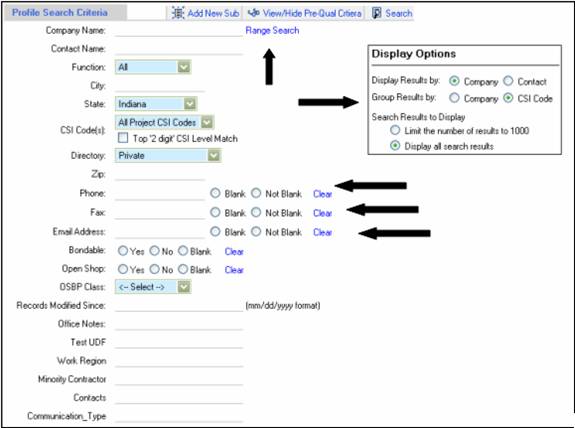
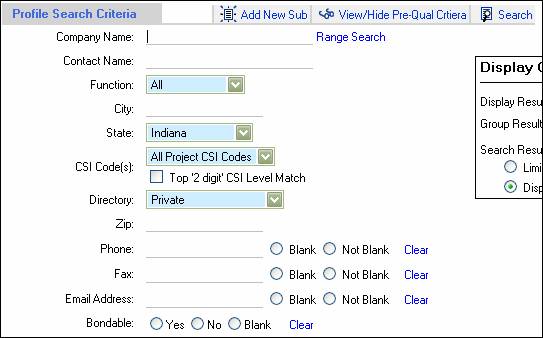
Range Search
Click on the Range Search link to enable the Range search.

You can see that with the range search you can now search for companies falling in a range based on their company name

A search based on the range defined above would bring back all the companies that begin with the letter “B” and end with the last company in the database that starts with the letter “G”.
Range search can aid you when you are attempting to do a search that you know is going to bring back more than 5000 records, as that is the highest limit there is on number of rows returned in the search results section.
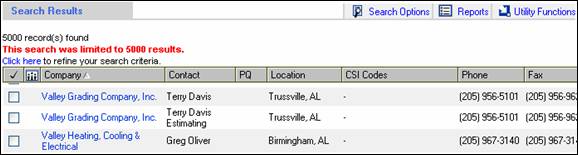
Scroll to the bottom of the 5000 results and find out where the results stopped.
Use that last company name as the basis for the beginning of your next range search.
In this example I would go from Metro to
Click on Search Options | Refine Search then use the Range
Search.


Some new Features:
Search for Blanks in Phone, Fax and Email
Searching by email address is a new feature. This is great for when you receive a message back in your inbox but you cant tell which company it is from because all that is displayed is the email address.
CSI Code Search
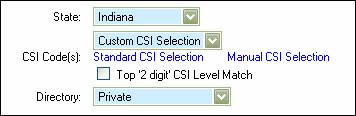
If you change the CSI Code drop down menu to Custom CSI Selection you will get the following two choices:
Standard CSI
Selection
Previously when you searched by CSI codes you could only
enter one at a time. This new
feature allows you to choose more than one.
To choose CSI codes using the box that looks like the following screen shot click on the Standard CSI Selection link:
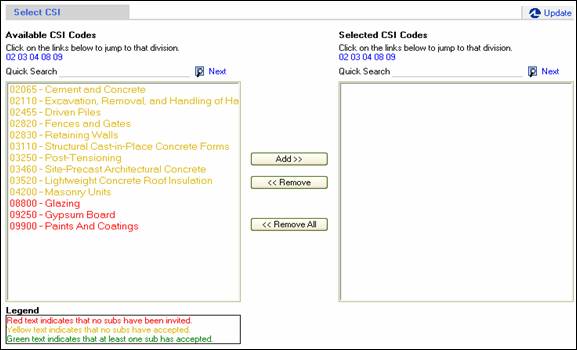
The list of codes on the left hand side of the window are
the codes that have been set up on the details page of the project. Highlight the codes you desire by clicking on
them and then click the ![]() button to move them over to the right hand
section, then click the
button to move them over to the right hand
section, then click the ![]() button.
button.
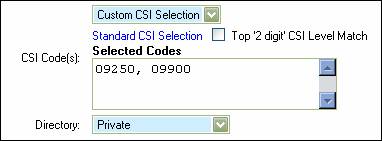
It displays the codes selected on the search page, then
click the
![]() button in the upper right hand corner to run the search.
button in the upper right hand corner to run the search.
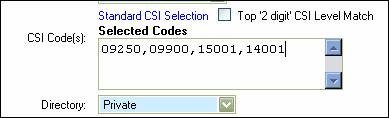
Manual CSI Selection
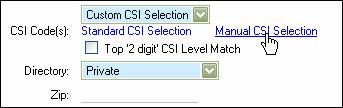
This will bring up the following box in which you can type out all the CSI codes you desire to search on. You must comma separate the codes and use leading zeros where needed.