Loading Plans into On-Screen Takeoff
As an alternative to the default viewer, iSqFt users have the option to download the On-Screen Takeoff viewer from On Center Software. If you have selected this option on your profile, the plans will automatically open in the On-Screen Takeoff viewer when you click on them from the list of plans on any project. If you want to load plans into the On-Screen Takeoff viewer that you have already downloaded or received from another source, you can do so by following the steps below.
| Start by creating a new Bid using the first icon on the toolbar. It will look like a page with a dollar sign. |
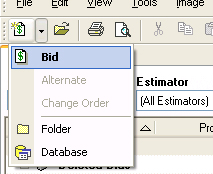 |
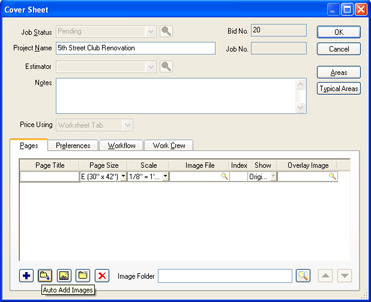
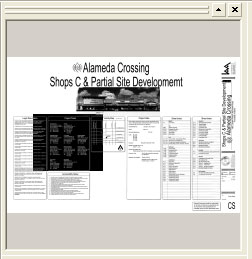
The Cover Sheet screen will open like in the example below. Here you can enter the name of the project and any notes you may need. You can add images that you have on you computer or a CD by clicking the Insert New Image Page to add a single plan sheet or Auto Add Images button to add all the plan sheets in the folder. Both buttons can be found in the bottom left corner of the Cover Sheet.
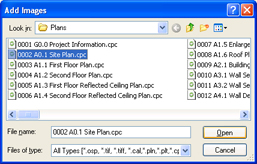
| Select the plan you want to add and select Open. If you clicked the Auto Add Images button, all files in that folder of the same file type as you selected (CPC, TIF, PDF, etc.) will be added to the Bid. |
 |
The files will be loaded to the Cover Sheet. Click Ok. The Bid creation is complete at this point and you will be taken to the Images page where you can see the plans.
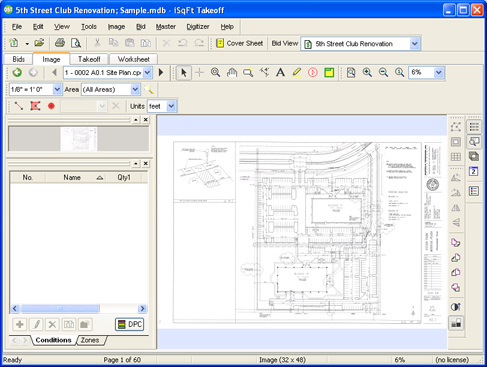
The Navigation buttons
![]()
- The back and forward buttons work similar to the way the back and forward buttons work in your web browser, taking you back and forward in the zoomed in views or plan sheets you were looking at.
- The black arrows allow you to go to the next, or previous plan sheets that you have loaded in on the Cover Sheet.
- The dropdown box will let you skip right to any plan that has been loaded into the Bid.
![]()
- The black arrow button will allow you to select or modify items you have placed in the main window such as takeoffs, dimensions, text or highlights
- The crosshair button will be selected when you are using the takeoff tools.
- The magnifying glass with allow you to click and drag a box in the main window to zoom into that section of the plan.
- The hand will allow you to click and drag the plan sheet around to pan around the plan.
- The second magnifying glass will allow you to magnify the area under the mouse cursor without zooming into the drawing.
- The dimension button with allow you to add dimensions to the drawing.
- The button that looks like an A will allow you to add a text note to the plan.
- The highlighter button will allow you to highlight a section of the plan.
![]()
- The first button will zoom completely out so the entire plan sheet is visible.
- The magnifying glass with the + will zoom into the current view by 10%.
- The magnifying glass with the - will zoom out of the current view by 10%.
- The magnifying glass with the 1 will zoom into the drawing so you are seeing it at 1:1 scale.
- The drop down box will allow you to select a typical zoom percentage. You can also type your own zoom level.
|
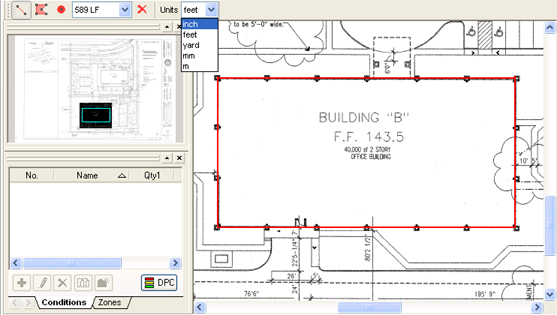
Pan Window The pan window shows a smaller version of the entire plan sheet you are currently viewing. If you are zoomed into the drawing the pan window will display a black box over the section of the plan that you currently have displayed in the main window. You can then click and drag the black box around in this small window to pan around the plan. |
 |
|
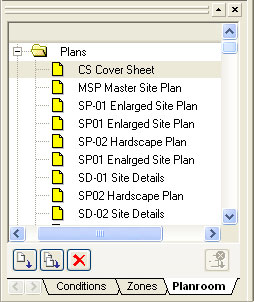
Planroom Tab If you opened the project from the iSqFt website, the Planroom tab shows a list of all the documents on the project from the iSqFt website. You can navigate through all the documents on the project including Plans, Specs and Addenda. You can choose to download only the documents you need or all of the documents from the project using the buttons below.
|
 |
Using On-Screen Takeoff
The On-Screen Takeoff viewer will allow you to do linear and area measurements as well as counts.
The Quick Takeoff buttons
![]()
- The first button allows you to do linear takeoffs.
- The second button allows you to take off areas.
- The circle button allows you to mark items on the plan sheet to count them.
- The first drop down menu shows the value for the current takeoff. Some takeoffs multiple measurements on the same take off. For example an area takeoff will also give the linear measurement around the perimeter of the area takeoff.
- The second drop down box will allow you to select the unit of measurement such as inches, feet, yards, meters or millimeters.
Linear Measurements
To do a linear measurement, first select the line button from the Quick Takeoff toolbar. The mouse cursor will turn into a crosshair while over the plan sheet to indicate you are in measurement mode. Click where you want to start your linear measurement and drag the line out from that point to the end point. Continue this process for each segment of the linear measurement you wish to do. The cumulative sum of all the segments will be displayed in the values dropdown box on the Quick Takeoff toolbar. You can change the unit of measurement if needed.
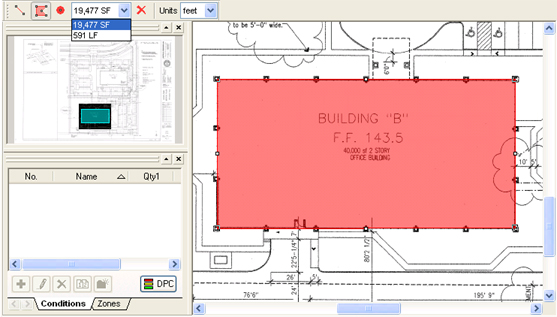
An area measurement is done much like a linear measurement. Start by selecting the area button from the Quick Takeoff toolbar. The mouse cursor will again turn into a crosshair while over the plan sheet to indicate you are in measurement mode. Click to set the first corner of the area you want to measure and then click the next corner and so on. In area measurement mode there is no need to hold the mouse button down. When you get to the final corner double click to tell indicate you have finished the area measurement. The area measured will fill in. You can continue to do other areas if you want them to be totaled together in the values dropdown. Notice that when you do an area measurement a linear measurement is taken around the perimeter and listed in the vales dropdown box, saving you from having to do a separate measurement.
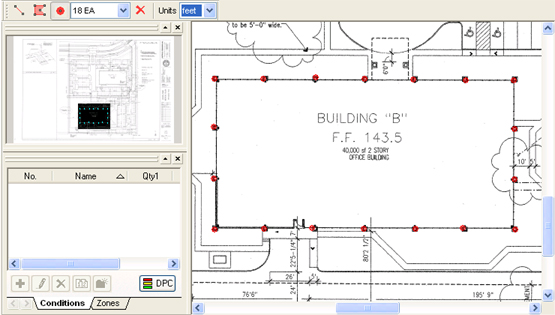
Counts
To do a count, select the count icon and click on the items on the plans sheet you want to count. A total of all the items you have clicked off will appear in the values dropdown box.
Printing From The On-Screen Takeoff Viewer
Tile printing allows you to print out the entire plan sheet to scale on multiple sheets of smaller paper using a normal printer. This feature is available through the On-Screen Takeoff viewer.
Once you have a plan open in the On-Screen Takeoff viewer that you want to tile print, click the print icon on the toolbar at the top or select File > Print.
That will bring up the print preview screen.
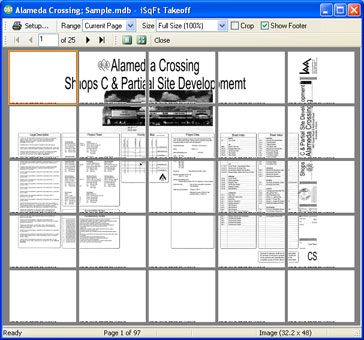
The print preview screen will show the drawing on the multiple sheets necessary to print the entire plan.
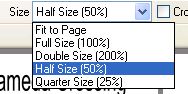
| You can print the drawing at half or quarter scale to save paper using the Size drop down from the top of the Print Preview screen. |
 |
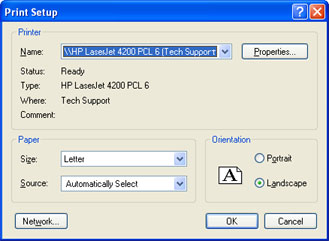
If you need to adjust this size if the paper that you have loaded into the printer click on the Setup button at the top of the Print Preview screen. It will give you options to select the printer to send the print job to as well as the size and orientation of the sheets.